I am an avid fan of the Paper Crafter's Library blog and website. It's a fantastic place to go to learn about anything and everything to do with paper crafting. They are now running a contest to win a year's membership (a $200 value!) Head on over the PCL to check it out!
This is a quick post today. I had not realized that it had been over a month since my last post :( I have been extremely busy with school (report card time is never fun), but that's done now, so I may have some time on my hands in which to craft! I will hopefully have some new projects to show you soon, but in the meantime go enter the PCL contest!!
Until next time,
Melanie
Friday, March 16, 2012

Monday, January 30, 2012
Presenting...
Scrappin' Sisters! These talented ladies have started a blog. There is not much on the blog yet, but I look forward to following it: scrappinsisters.wordpress.com Take the time to check out the gallery areas - they are 3 very scrap-savvy ladies and their projects are gorgeous (and for sale!) I met two of the sisters through events at Shelley's, but finally had a chance to see their work up close and personal at a scrapbooking convention this past weekend. They had a booth set up and were selling their items: gorgeous altered notebooks, home decor, tags, cards, scrapbook pages and more. They were also doing demos. I was only able to catch one, but it was pretty amazing! Flowers from used dryer sheets - you have to see them to believe them. Now I just need to buy the flower die and stop using liquid softener in the wash. Then I'll never have to buy flowers again!!
I also did a few demos this past weekend. I demoed glitter, i-rock, liquid appliqué and Sew Easy. It was a fun couple of hours, but with family feeling under the weather, I was glad I didn't have to stay all day.
Sorry, no pics this time, but I hope to post later in the week with a better update!
Until next time,
Melanie
I also did a few demos this past weekend. I demoed glitter, i-rock, liquid appliqué and Sew Easy. It was a fun couple of hours, but with family feeling under the weather, I was glad I didn't have to stay all day.
Sorry, no pics this time, but I hope to post later in the week with a better update!
Until next time,
Melanie
Tuesday, January 10, 2012
It's a miracle...
I'm posting again already! I think that being responsible for keeping Shelley's blog up to date will help me with mine :) I'm just going to do a quick post today to show off the cards I'll be teaching on February 11th for Valentine's Day.

The cards were inspired by the Paper Crafter's Library blog. Of course, I used what I had on hand, rather than go out and buy the specific items to make the cards, so they are makeovers, rather than copies. I have to admit though, that my favourite, the U Rock, is pretty close to the original!
Sadly, with school back on, I have school work to take care of, so that's all I have time for tonight!
Until next time,
Melanie

The cards were inspired by the Paper Crafter's Library blog. Of course, I used what I had on hand, rather than go out and buy the specific items to make the cards, so they are makeovers, rather than copies. I have to admit though, that my favourite, the U Rock, is pretty close to the original!
Sadly, with school back on, I have school work to take care of, so that's all I have time for tonight!
Until next time,
Melanie
Friday, January 6, 2012
Happy New Year!
It seems I'm always playing catch-up with my blog. Being busy is not an excuse... being forgetful and (gasp!!) lazy is not an excuse either, but perhaps a valid reason!
I've recently taken over the blog duties for Scrapbooking at Shelley's. I am going to be posting there at least once a week, and will try to post here at the same time.
In the month of November, I went absolutely Advent Calendar crazy! I got an idea for creating my own calendar from scratch, and rolled with it. I loved how the first one turned out, so I went on to make 8 more, for a total of 9 calendars. With each calendar taking about 2-3 hours to make, it took me all month, but they were ready for December 1st! The girls each gave one to their classroom teachers as well as the music teacher and teacher librarian. I gave one to my BFF, and we kept the other 4 at home for ourselves (selfish, I know!) It was a lot of fun to make them, and even more fun to shop for the goodies to go inside. Here they are:
 I made each box individually from paper or card stock, then wrapped them to make drawers. I glued the drawers together, then wrapped the whole thing in a paper box. I added numbers to the drawers, along with ribbon pulls, and decorated the final box. I love how they turned out! I may have to teach this class sometime during the year. It would make a lovely jewelry box, and of course, who doesn't need an advent calendar at Christmas??
I have also been busy designing for my classes at Shelley's. Here is the Hot Chocolate Gift Book I will be teaching on January 21st:

This project was inspired by Andrea Walford's blog. Hers used a 6" tube for the marshmallows, but all I had was a 12" tube, so I doubled the height and included 4 packets of hot chocolate. Here is a pic of the inside:

And finally, a close-up of the mug on the front. The whipped cream was done using liquid appliqué.
 I hope you enjoyed today's post. Until next time!!
I've recently taken over the blog duties for Scrapbooking at Shelley's. I am going to be posting there at least once a week, and will try to post here at the same time.
In the month of November, I went absolutely Advent Calendar crazy! I got an idea for creating my own calendar from scratch, and rolled with it. I loved how the first one turned out, so I went on to make 8 more, for a total of 9 calendars. With each calendar taking about 2-3 hours to make, it took me all month, but they were ready for December 1st! The girls each gave one to their classroom teachers as well as the music teacher and teacher librarian. I gave one to my BFF, and we kept the other 4 at home for ourselves (selfish, I know!) It was a lot of fun to make them, and even more fun to shop for the goodies to go inside. Here they are:
 I made each box individually from paper or card stock, then wrapped them to make drawers. I glued the drawers together, then wrapped the whole thing in a paper box. I added numbers to the drawers, along with ribbon pulls, and decorated the final box. I love how they turned out! I may have to teach this class sometime during the year. It would make a lovely jewelry box, and of course, who doesn't need an advent calendar at Christmas??
I have also been busy designing for my classes at Shelley's. Here is the Hot Chocolate Gift Book I will be teaching on January 21st:

This project was inspired by Andrea Walford's blog. Hers used a 6" tube for the marshmallows, but all I had was a 12" tube, so I doubled the height and included 4 packets of hot chocolate. Here is a pic of the inside:

And finally, a close-up of the mug on the front. The whipped cream was done using liquid appliqué.
 I hope you enjoyed today's post. Until next time!!
Tuesday, July 26, 2011
Dusty Attic Laser Cuts
I love this new product from Dusty Attic. The laser cut chipboard and wood are gorgeous, and they really make for a great layout. In these two, I used the butterflies and the frame as masks, then spritzed Glimmer Mist all over some white cardstock. I then used the butterflies and the frame as embellishments. I used 3 colours of Glimmer Mist: red, yellow and blue. When all 3 are sprayed on the chipboard, the result is a beautiful bronze colour. Enjoy!


Thursday, July 14, 2011
New Class!
I'm doing a new class for Shelley called Quick Cards. It features the new cards and envelopes from Doodlebug. I love how quickly the card comes together. It's easy to dress them up, or just leave them plain and simple. They look good no matter what! Here is the series of 4 cards I'm teaching on September 28th. Please join me!
 This card features a pretty pink card base, with embossed Gel-a-tins chocolates and a few self-adhesive rhinestones.

I really liked the effect of adding a photo to this blue window card. It also features studs from the i-rock product line, and a hand written sentiment.

A few self-adhesive rhinestones, a ribbon, a greeting, and you're good to go with this summery green and red card.
 A sheer ribbon, computer printed greeting and some i-rock bling make this card an elegant choice for a summer wedding.
 This card features a pretty pink card base, with embossed Gel-a-tins chocolates and a few self-adhesive rhinestones.


I really liked the effect of adding a photo to this blue window card. It also features studs from the i-rock product line, and a hand written sentiment.

A few self-adhesive rhinestones, a ribbon, a greeting, and you're good to go with this summery green and red card.
 A sheer ribbon, computer printed greeting and some i-rock bling make this card an elegant choice for a summer wedding.
Catching up
I have been crafting, really. The problem is that I have been crafting for Shelley, not for myself, and forgot to take pics before delivering. I rectified the situation by going in to the store and snapping some pics of my art already on the walls. The result is not-quite-right photos, but at least I have photos now!
Here, you will see some layouts I did for display. I used a layout guide and turned it 90 degrees for the second page.


Next is July's Layout Challenge. As a designer, I don't get to enter the contest for the $50 gift card, but I do get to try to inspire you to create! I love the way this turned out. It's so nice to work with a series of patterned paper - it all comes together so well! The flowers are, for the most part, Prima. The butterfly is a Tim Holtz die from Sizzix.

Here, you will see some layouts I did for display. I used a layout guide and turned it 90 degrees for the second page.


Next is July's Layout Challenge. As a designer, I don't get to enter the contest for the $50 gift card, but I do get to try to inspire you to create! I love the way this turned out. It's so nice to work with a series of patterned paper - it all comes together so well! The flowers are, for the most part, Prima. The butterfly is a Tim Holtz die from Sizzix.

Monday, June 20, 2011
Spring Bling
Shelley asked me to create a Spring layout - using lots of... stuff: bling, glitter, flowers, chipboard, embellishments - whatever. It took me forever to get it done, but this is the result.
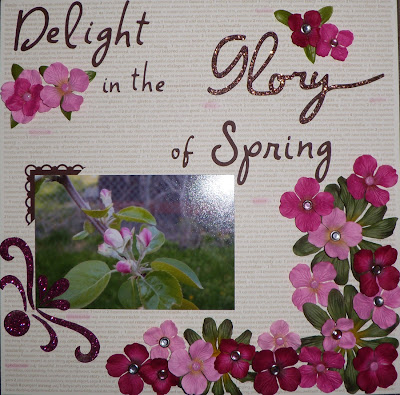 If you ignore the flash reflection, it's kind of pretty :) The photo is of apple blossoms on one of our new apple trees... so "spring!"
 If you ignore the flash reflection, it's kind of pretty :) The photo is of apple blossoms on one of our new apple trees... so "spring!"
Friday, June 10, 2011
New Class Date
Just a quick post to say that the Peel Offs class discussed in the previous post has been moved to June 21st. There's still time to sign up!
Monday, May 23, 2011
Peel Offs
So, despite the lovely weather, the schoolwork and the yard work, I was able to sit down tonight and create. On Thursday, June 9th, I am teaching a class at Shelley's. It's all about Peel Offs. If you've never used them, you're in for a treat! Peel Offs are vinyl outline stickers. It sounds pretty simple, but they really pack a punch! Below are the cards I will be doing for the class. I apologize for the bad quality of the photos. I was going for speed rather than artistry tonight!

This card was done using black Peel Offs. I stuck them right to the blue cardstock. I then used an aqua brush. They come in all kinds of brand names, but basically it's a paintbrush with a hollow handle. The handle can be filled with water, to provide tons of painting time without the need for a dish of water. In this case though, I filled the brush with bleach, and painted the area inside the Peel Off. I let it dry and painted it again, but it didn't change the colour much. The result is a very pretty pale green flower in the corner of my card.

For the butterfly, I used gold Peel Offs. I simply stuck the butterfly to white cardstock and coloured it with my gel pens. It looks like stained glass - simply beautiful!

The second butterfly was done using the negative image of the stained glass butterfly. I used painter's tape to lift the pieces off the backing sheet, so that I didn't have to worry about positioning them perfectly on the card. It took a bit of time, but the result was well worth it.

This birthday card was done with double-stick Peel Offs. They are completely clear shapes, sticky on both sides. This cupcake is actually 9 pieces! I first stuck on the cupcake wrapper and covered it with super fine brown glitter. After taking off the excess, I added the stripe pieces and the first cupcake topper. I used orange glitter on them. After clearing off the excess orange, I added the top of the cupcake and used brown glitter again. Finally, I added the hot pink cherry on top (I really wanted to go red, but don't yet own fine red glitter, and chunky just wouldn't have looked right.)
Of course, Peel Offs can be used on scrapbook layouts, on 3D projects, they stick beautifully to glassware for a decorative touch too! I hope you can make it out to my class on June 9th to experience Peel Offs for yourself!

This card was done using black Peel Offs. I stuck them right to the blue cardstock. I then used an aqua brush. They come in all kinds of brand names, but basically it's a paintbrush with a hollow handle. The handle can be filled with water, to provide tons of painting time without the need for a dish of water. In this case though, I filled the brush with bleach, and painted the area inside the Peel Off. I let it dry and painted it again, but it didn't change the colour much. The result is a very pretty pale green flower in the corner of my card.

For the butterfly, I used gold Peel Offs. I simply stuck the butterfly to white cardstock and coloured it with my gel pens. It looks like stained glass - simply beautiful!

The second butterfly was done using the negative image of the stained glass butterfly. I used painter's tape to lift the pieces off the backing sheet, so that I didn't have to worry about positioning them perfectly on the card. It took a bit of time, but the result was well worth it.

This birthday card was done with double-stick Peel Offs. They are completely clear shapes, sticky on both sides. This cupcake is actually 9 pieces! I first stuck on the cupcake wrapper and covered it with super fine brown glitter. After taking off the excess, I added the stripe pieces and the first cupcake topper. I used orange glitter on them. After clearing off the excess orange, I added the top of the cupcake and used brown glitter again. Finally, I added the hot pink cherry on top (I really wanted to go red, but don't yet own fine red glitter, and chunky just wouldn't have looked right.)
Of course, Peel Offs can be used on scrapbook layouts, on 3D projects, they stick beautifully to glassware for a decorative touch too! I hope you can make it out to my class on June 9th to experience Peel Offs for yourself!
Sunday, May 22, 2011
Scrapping Space
Everyone who crafts needs a space in which to create. Sometimes it's the kitchen table, others have whole studios in which to putter. I started with the kitchen table, years ago, and have slowly expanded my space. I now have a whole room - a small one, but a space all my own.
I am very lucky in this, but it spoils me for when I go to crops. I never seem to be able to take everything I want! I also have a hard time keeping it tidy. When nothing but crafting goes on in the space, there's little incentive to clean up the project(s) at the end of the day. After all, I'll be coming back to it, right?
Well Shelley is having a contest right now. To enter, you have to submit pics of your scrapbooking space. Do I need to enter? Nope. But as a design team member and instructor, I kind of have to provide the photos. So I spent a few hours (I won't say exactly how many, it's embarrassing), cleaning and sorting and putting away. My space is now something I am proud to show off. So here it is:

This is my supplies wall. I love these cabinets! We picked them up at Canadian Tire a few years ago, and I really don't know how I did without them. I also have my paper in racks, divided by colour, and of course my stamps up top where I can see them easily. The drawers are full of tools, embellishments, idea books and more. It's hard to read the wall decal, but it says "So many toys, so little time." Isn't that the truth!?!
 This is where all the action happens. I have my punches within reach, thanks to my wonderful hubby, Trevor. I also have my favourite brads, eyelets and markers close to hand - not to mention the ever useful Cricut. Hidden behind my marker caddy is my Tassimo coffee maker - for those late-night crafting sessions! (And yes, there is a fridge in my space. Sadly, it's just our basement fridge, and holds nothing more exciting than a few extra jugs of milk and some soft drinks...)
 Here, to the left of where I sit to craft, I have my ink caddies, ribbon, my Big Shot, more storage, this time for projects in progress (and things still to scrapbook.) The quote on the wall is from Stampin' Up! and is the definition of "create". The extra table is there more for storage than anything else, but I do use it for extra crafting space in a pinch (usually when I'm switching between projects without putting things away!)
Now off to bed with me, as it's late. If I get all of my schoolwork out of the way early tomorrow, maybe I'll actually have time to make something in my newly cleaned space!
I am very lucky in this, but it spoils me for when I go to crops. I never seem to be able to take everything I want! I also have a hard time keeping it tidy. When nothing but crafting goes on in the space, there's little incentive to clean up the project(s) at the end of the day. After all, I'll be coming back to it, right?
Well Shelley is having a contest right now. To enter, you have to submit pics of your scrapbooking space. Do I need to enter? Nope. But as a design team member and instructor, I kind of have to provide the photos. So I spent a few hours (I won't say exactly how many, it's embarrassing), cleaning and sorting and putting away. My space is now something I am proud to show off. So here it is:

This is my supplies wall. I love these cabinets! We picked them up at Canadian Tire a few years ago, and I really don't know how I did without them. I also have my paper in racks, divided by colour, and of course my stamps up top where I can see them easily. The drawers are full of tools, embellishments, idea books and more. It's hard to read the wall decal, but it says "So many toys, so little time." Isn't that the truth!?!
 This is where all the action happens. I have my punches within reach, thanks to my wonderful hubby, Trevor. I also have my favourite brads, eyelets and markers close to hand - not to mention the ever useful Cricut. Hidden behind my marker caddy is my Tassimo coffee maker - for those late-night crafting sessions! (And yes, there is a fridge in my space. Sadly, it's just our basement fridge, and holds nothing more exciting than a few extra jugs of milk and some soft drinks...)
 Here, to the left of where I sit to craft, I have my ink caddies, ribbon, my Big Shot, more storage, this time for projects in progress (and things still to scrapbook.) The quote on the wall is from Stampin' Up! and is the definition of "create". The extra table is there more for storage than anything else, but I do use it for extra crafting space in a pinch (usually when I'm switching between projects without putting things away!)
Now off to bed with me, as it's late. If I get all of my schoolwork out of the way early tomorrow, maybe I'll actually have time to make something in my newly cleaned space!
Sunday, August 22, 2010
Going Digital?
Before going further with this post, I have to say that I will never give up my paper scrapbooking. There is something very satisfying in the feel of the paper and the embellishments. That said, I have been experimenting a little with digital.
Because I use a laptop, digital is very portable for me. I can take my scrapbooking anywhere and have access to all of my papers and tools at the click of a button. I think what I like best about it though, is that I can experiment with colour and placement, interchange mats, add and remove ribbons - all without wasting! If I really like what I create when playing around, I can always duplicate it in paper (and sometimes I do just that.) I can also do hybrid pages, where I start with a digital layout, print it and then add traditional scrapbooking elements to it for a dimensional feel.
The following layouts are done using a digital kit purchased from DCWV's digital site 300dpi.com. My photos are not the best quality, but I loved the sheer abandon of the spontaneous dance!


Of course, there are also many sites where you can download free kits, and some are VERY good. These pages were done with a kit from computerscrapbook.com, but I also really like the free kits from Shabby Princess.

 When digi-scrapping, I use Stampin' Up!'s My Digital Studio software. Why MDS? I was a SU Demo for 4 1/2 years. I got into digital with MDS, and actually, it's a pretty decent program. Easier to pick up and use that Adobe Photoshop (though not as versatile), and it allows you to use any and all of your digital products, regardless of where you get them. For me, it's the quick & easy of digital scrapping. It allows me to print using my own printer, but if I want 12x12, I have the option of printing with Stampin' Up! or exporting to any service I like. Am I endorsing the MDS? Not really. Any digital program out there has it's good and bad points. The thing is to get going and start using it, even if it's just for brainstorming!

Because I use a laptop, digital is very portable for me. I can take my scrapbooking anywhere and have access to all of my papers and tools at the click of a button. I think what I like best about it though, is that I can experiment with colour and placement, interchange mats, add and remove ribbons - all without wasting! If I really like what I create when playing around, I can always duplicate it in paper (and sometimes I do just that.) I can also do hybrid pages, where I start with a digital layout, print it and then add traditional scrapbooking elements to it for a dimensional feel.
The following layouts are done using a digital kit purchased from DCWV's digital site 300dpi.com. My photos are not the best quality, but I loved the sheer abandon of the spontaneous dance!


Of course, there are also many sites where you can download free kits, and some are VERY good. These pages were done with a kit from computerscrapbook.com, but I also really like the free kits from Shabby Princess.

 When digi-scrapping, I use Stampin' Up!'s My Digital Studio software. Why MDS? I was a SU Demo for 4 1/2 years. I got into digital with MDS, and actually, it's a pretty decent program. Easier to pick up and use that Adobe Photoshop (though not as versatile), and it allows you to use any and all of your digital products, regardless of where you get them. For me, it's the quick & easy of digital scrapping. It allows me to print using my own printer, but if I want 12x12, I have the option of printing with Stampin' Up! or exporting to any service I like. Am I endorsing the MDS? Not really. Any digital program out there has it's good and bad points. The thing is to get going and start using it, even if it's just for brainstorming!
Saturday, August 21, 2010
Summer is Great!
And it's almost over. I've been very busy this summer, getting ready for new jobs at school, having laser eye surgery, visiting with family, planning birthday parties for both girls and of course, paper crafting!
Lately I've been busy creating for Shelley - classes for this fall, and a challenge. My goal is to plan one project a month to teach at Shelley's. If there is enough interest, the class will go ahead. If not, it gets canceled. Either way, I win, since I have to make the sample, and it gets me motivated!
When I plan projects for Shelley's, they tend to be 3D items or mini albums. The other ladies on the design team lean more toward card and scrapbook classes. That said, if you happen to see something on my blog that you like, I can arrange to teach it at Shelley's!
I created this project for Shelley's October website challenge. Four of us were given a similar set of products and challenged to create! I used the Tri-Shutter Album template from Andrea Walford's website (though you can google to find similar ones.) This is also a class that I will be teaching on Saturday, September 18th at 1pm (which explains why I have it ready so early!)
.

The album holds 5 pictures, with ample space for quotes or journaling. It looks really complicated, but it's pretty easy to put together. If you take the class, you'll receive a handout with full cutting and assembling instructions.

I'm not going to post all of my classes today... you need to have something to come back for! But I will post October's class - I'd hate for you to miss the sign-up! I am teaching this one at 7:30pm on Thursday, October 7th. Don't miss it!

This cute Friendship Box measures only 5 1/2" tall, but it packs a lot of punch, look:

This box design is by Pam Curtis (I think I found the template on splitcoaststampers.) Of course, you can make it into any kind of box you like... all the quotes and greetings are done by hand, so you can change it any way you like. The little boxes are about 2x2 and are perfect for holding an assortment of small scrapbooking supplies, earrings, candies, chocolate, stationary supplies, etc. It would make a great gift for a grandparent, babysitter, teacher - anyone who is hard to buy for. With masculine papers it could even hold a variety of small fishing lures for dad or grandpa. If you sign up for the class, I will have my quote books handy for your inspiration!
Now, off to ice a cake and get ready for tomorrow's ordeal (I mean birthday party!)

Lately I've been busy creating for Shelley - classes for this fall, and a challenge. My goal is to plan one project a month to teach at Shelley's. If there is enough interest, the class will go ahead. If not, it gets canceled. Either way, I win, since I have to make the sample, and it gets me motivated!
When I plan projects for Shelley's, they tend to be 3D items or mini albums. The other ladies on the design team lean more toward card and scrapbook classes. That said, if you happen to see something on my blog that you like, I can arrange to teach it at Shelley's!
I created this project for Shelley's October website challenge. Four of us were given a similar set of products and challenged to create! I used the Tri-Shutter Album template from Andrea Walford's website (though you can google to find similar ones.) This is also a class that I will be teaching on Saturday, September 18th at 1pm (which explains why I have it ready so early!)
.

The album holds 5 pictures, with ample space for quotes or journaling. It looks really complicated, but it's pretty easy to put together. If you take the class, you'll receive a handout with full cutting and assembling instructions.

I'm not going to post all of my classes today... you need to have something to come back for! But I will post October's class - I'd hate for you to miss the sign-up! I am teaching this one at 7:30pm on Thursday, October 7th. Don't miss it!

This cute Friendship Box measures only 5 1/2" tall, but it packs a lot of punch, look:

This box design is by Pam Curtis (I think I found the template on splitcoaststampers.) Of course, you can make it into any kind of box you like... all the quotes and greetings are done by hand, so you can change it any way you like. The little boxes are about 2x2 and are perfect for holding an assortment of small scrapbooking supplies, earrings, candies, chocolate, stationary supplies, etc. It would make a great gift for a grandparent, babysitter, teacher - anyone who is hard to buy for. With masculine papers it could even hold a variety of small fishing lures for dad or grandpa. If you sign up for the class, I will have my quote books handy for your inspiration!
Now, off to ice a cake and get ready for tomorrow's ordeal (I mean birthday party!)

Saturday, February 20, 2010
It's been a while...
Yes, it's been a long time since my last post. I've been super-busy with school, and it's not likely to end anytime soon, lol! As for stamping, I haven't really done a lot since Christmas, but was recently inspired to create a few cards. One of the groups I belong to, as a Stampin' Up! demo issued a January and then a February challenge. I created one card for the January challenge (just one hour before the deadline!), and have now created 2 for the February challenge - and I hope to do more!
This card was for the January challenge: to use a card map from pagemaps.com.
 I really like the way it turned out... I used all current SU products, including many from the new Occasions Mini catalogue. I love the glitter in the paper, and the epoxy brads are so cute:).
The February challenge is a lot harder, I think. It's a colour challenge, using Baja Breeze, More Mustard, So Saffron, a deep red, Cameo Coral and Whisper White.
This first card is all paper piecing. I sponged the white background with Baja Breeze. The flowers and the sun are all sponged as well. The more mustard frame is just that: a frame, with the white background showing through. Even though I found the colour combo hard to work with, I really like how it turned out.
 The second card I did for the colour challenge, I created using SU's digital software, My Digital Studio. I really enjoyed using the MDS for this challenge, as it allowed me to design away, switching colours at will, without wasting cardstock. I finally came up with a card I really like, and I may actually get out my ink and stamp this one for real!
 I will post again when I have created my next cards (or scrapbook pages!) Hopefully, it won't be as long a wait!

This card was for the January challenge: to use a card map from pagemaps.com.
 I really like the way it turned out... I used all current SU products, including many from the new Occasions Mini catalogue. I love the glitter in the paper, and the epoxy brads are so cute:).
The February challenge is a lot harder, I think. It's a colour challenge, using Baja Breeze, More Mustard, So Saffron, a deep red, Cameo Coral and Whisper White.
This first card is all paper piecing. I sponged the white background with Baja Breeze. The flowers and the sun are all sponged as well. The more mustard frame is just that: a frame, with the white background showing through. Even though I found the colour combo hard to work with, I really like how it turned out.
 The second card I did for the colour challenge, I created using SU's digital software, My Digital Studio. I really enjoyed using the MDS for this challenge, as it allowed me to design away, switching colours at will, without wasting cardstock. I finally came up with a card I really like, and I may actually get out my ink and stamp this one for real!
 I will post again when I have created my next cards (or scrapbook pages!) Hopefully, it won't be as long a wait!
Monday, October 5, 2009
Christmas is coming...
And so is a Christmas Stamp-a-Stack! It seems that my posts will come only quarterly - not what I had in mind when I created this blog, but I seem to be too busy to post more frequently, lol!
I feel like the school year just started, but it's already into October, and it's time to start thinking about Christmas cards. I know, it's still a couple of months away, but if I want to order my supplies and get them made, I have to start now.
For those of you who would love to hand-make your Christmas cards this year, but don't have the supplies, or the time to design them, this Stamp-a-Stack is for you!
You'll make 24 cards (plus one bonus card!) in one afternoon. The picture below shows the group of 12 cards - you'll made 2 of each. These are simple and quick to make, just stamps, ribbon and cardstock. Please contact me for dates and pricing!
Happy Stamping!


I feel like the school year just started, but it's already into October, and it's time to start thinking about Christmas cards. I know, it's still a couple of months away, but if I want to order my supplies and get them made, I have to start now.
For those of you who would love to hand-make your Christmas cards this year, but don't have the supplies, or the time to design them, this Stamp-a-Stack is for you!
You'll make 24 cards (plus one bonus card!) in one afternoon. The picture below shows the group of 12 cards - you'll made 2 of each. These are simple and quick to make, just stamps, ribbon and cardstock. Please contact me for dates and pricing!
Happy Stamping!


Thursday, July 16, 2009
Summer Card Buffet
It's time for my first card buffet of the summer! I had so much fun creating these cards, and hope you like them too :) If you are interested in attending the card buffet, please email me asap to book your spot. If there is a card you particularly like, and you think you'd like to make several, let me know when you register so that I can cut extras.
The card buffet will take place at my home, on Thursday, July 23rd at 7:00pm. If you prefer an afternoon session, please let me know, and I will schedule one if there is enough interest.
What is a card buffet? For those of you who have never attended a card buffet, it works kind of like a food buffet. You make only the cards you want to make, leave the ones you don't like. The minimum number of cards to make at a buffet is 10, but you can make more if you like, and if you have time! You also get to stamp a matching envelope for each card. It's a great way to stock up on greeting cards without buying a ton of supplies. For class cost, or to register, please email me!


The card buffet will take place at my home, on Thursday, July 23rd at 7:00pm. If you prefer an afternoon session, please let me know, and I will schedule one if there is enough interest.
What is a card buffet? For those of you who have never attended a card buffet, it works kind of like a food buffet. You make only the cards you want to make, leave the ones you don't like. The minimum number of cards to make at a buffet is 10, but you can make more if you like, and if you have time! You also get to stamp a matching envelope for each card. It's a great way to stock up on greeting cards without buying a ton of supplies. For class cost, or to register, please email me!


Subscribe to:
Posts (Atom)